Real-time Moon Phase display for the PC
For some time now, I've enjoyed multiple monitors at my desk, and with that sort of real estate, I often have programs running all the time which I often refer to for either reference or quick-access. One of the displays I've sought was a real-time display of the current phase of the moon. Reasons for this vary from person to person, but since I often need to know when the current Hebrew month is ending or beginning, and for astronomical awareness, it's simply nice to have at-a-glance a way to know what tonight's moon phase will be!
(Note: This article has become a bit dated as new versions of Stellarium are released which require slightly different instructions than provided here. In particular, the scripting described in this article does not work well will versions later than 0.12.)
For a while, there were PC "gadgets" you could run which would display on a monitor, such things as weather, clock, headlines, that sort of thing, and they included a "Moon Phase" gadget. But gadgets have fallen out of vogue, and are mostly no longer supported so I've been on a search for something else. For a while, I would use the "Moon Phase Module" from calculatorcat.com and it would seem to work fine for hours to days, then I would notice that it simply displayed the wrong phase, and was no longer updating. This happened too often for the gadget to be relied on, so I stopped using it.
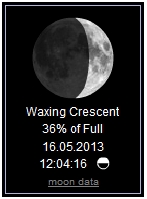
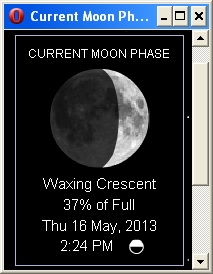
Above, left, example of the moon phase display from calculatorcat.com; Right, as displayed in an Opera browser window.
Further, the moon "module" from calculatorcat.com is intended to be displayed within a web page, which is great, but what I wanted was a moon phase indication not in a web page, but on my PC desktop. So I would use their module in a page of its own (example above), then make the resulting page display as small as possible in an appropriate spot on my screen. The Opera web browser is nice for this because all menus and toolbars can be turned off. But, as I said, eventually I would notice the display was no longer updating.
Another, minor issue with the moon phase module was that at on any given day, the moon's display was only an estimate of the true appearance of the phase. This is a minor nitpick, but if the moon is past 1st quarter, for example, then the moon's phase displayed, IMHO, should reflect that the phase is now waxing gibbous and not still showing 1st Qtr.
This still left me wanting however, so I kept searching. Finding nothing suitable, finally, I hit upon an idea!
What I envisioned, was displaying only the moon using the very fine astronomy software Stellarium, and setting Stellarium to be "locked" on the moon, and zoomed-in such that the phase of the moon was displayed to a size I desired, and thus, Stellarium, always updating in real time, and not requiring an Internet connection, would always show the moon's phase, pretty close to reality!
Bottom line is it works! So what I am providing here are some instructions on how to set this up for those who might like it! Here is a screen shot of the display. On this day the moon was not yet at first quarter, and by virtue that the crescent is displayed in the window as it is, reveals that this was near noon, my local time, and that, of course, at my sunset, the crescent would be turned facing the sun toward the west.
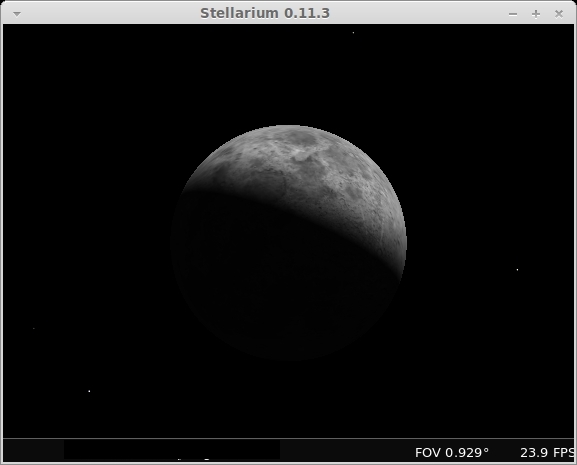
(Note that an immediate objection to this presentation of the moon's phase, is that no data is presented - no "phase percentage", no altitude or azumuth, no "age of the moon" in days, no calendar date & time displayed, etc. All valid objections! But, I don't need the date & time as the display is "real time", and my goal is to see the phase - that's all. If one desires the additional data, the data display can be enabled. See below.)
Manually Configuring Stellarium
(See below for a script which automates the setup.)
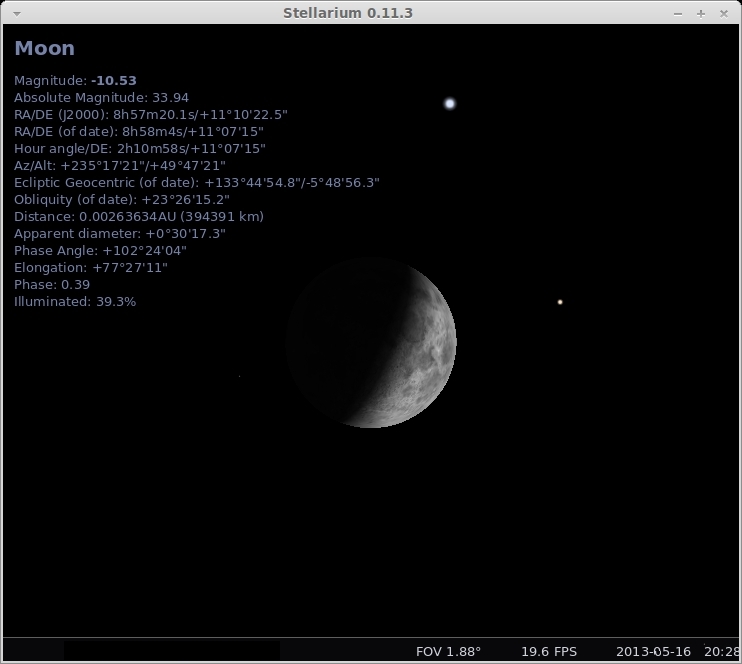
The reader familiar with Stellarium will know that when an object is "selected", that object becomes surrounded by a rotating red "crosshair", and much astronomical data about the object is displayed in the upper left-hand corner of the display, like this:
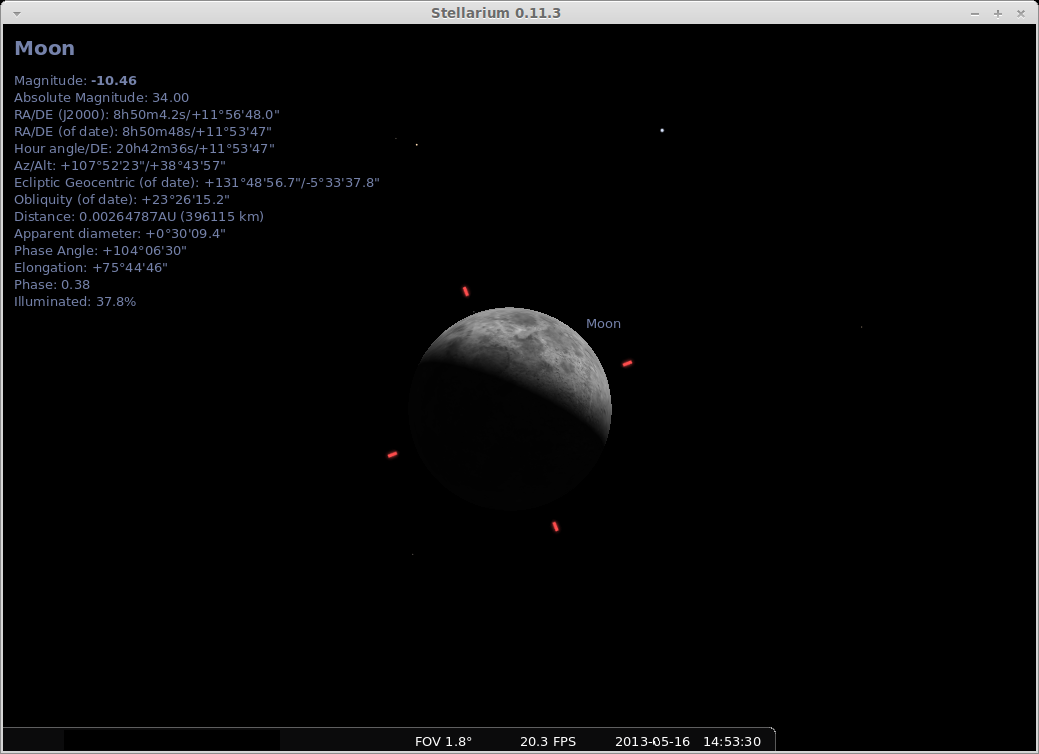
For this display, select the moon (red crosshairs appear around the moon), center the moon in the display by clicking on the "Center on selected object" button (see next graphic, below), then zoom to the desired level using the Page UP/Down or CTRL+Up/Down Arrow on your keyboard.

NOTE: These instructions are for Stellarium version 0.11.3. Later versions display some menu items differently than shown here; but I have been successful using this technique through version 12.5. I have had trouble with version 13 and higher, so there are likely some scripting changes needed in versions higher than 12.5. For now, my solution is to simply keep using 12.5!
What I want to do is:
- Turn off the "selected object" data display;
- Turn off the "Moon" label; I know it's the moon!;
- Turn off the crosshairs;
- and turn off all other data display (atmosphere, ground, etc.)
1. Turn off the "selected object" data display
First to turn off the data display for the selected object, go to the configuration button:
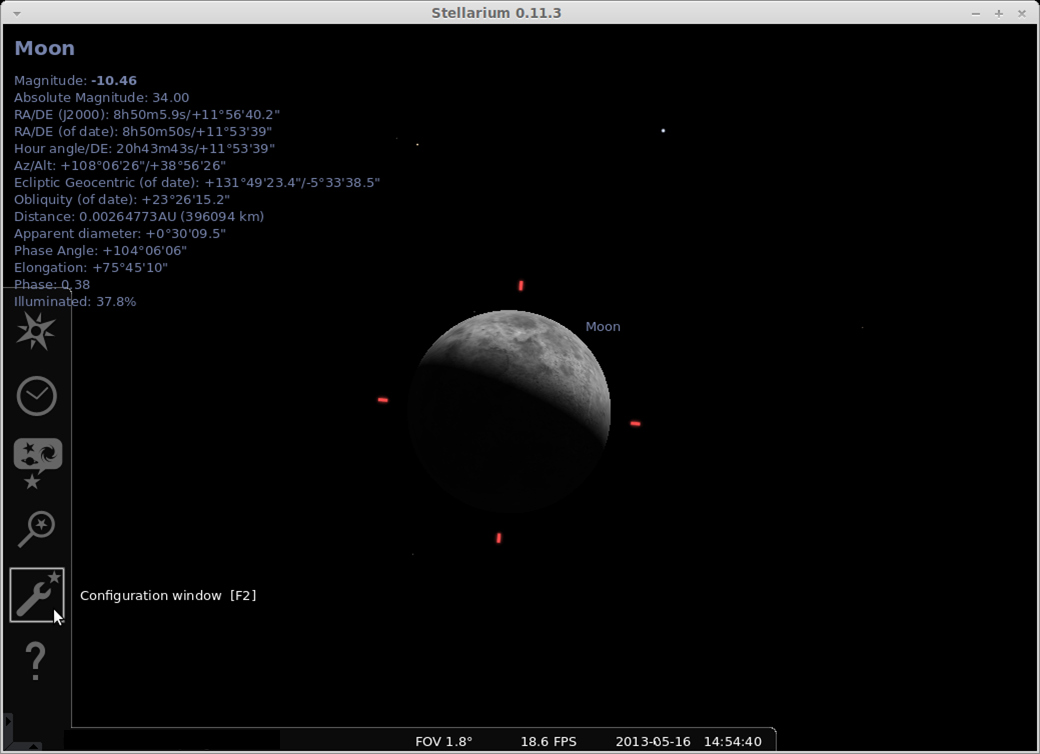
Then choose "none" under "Selected object information" in the "Main" tab. (Note: in v0.12.4, this information is found under "Configuration/Information"):

Close the Configuration window by clicking on the X in the upper right-hand corner of the dialog window.
2. Turn off the "Moon" label
Next, go to "Planet labels" at the bottom:
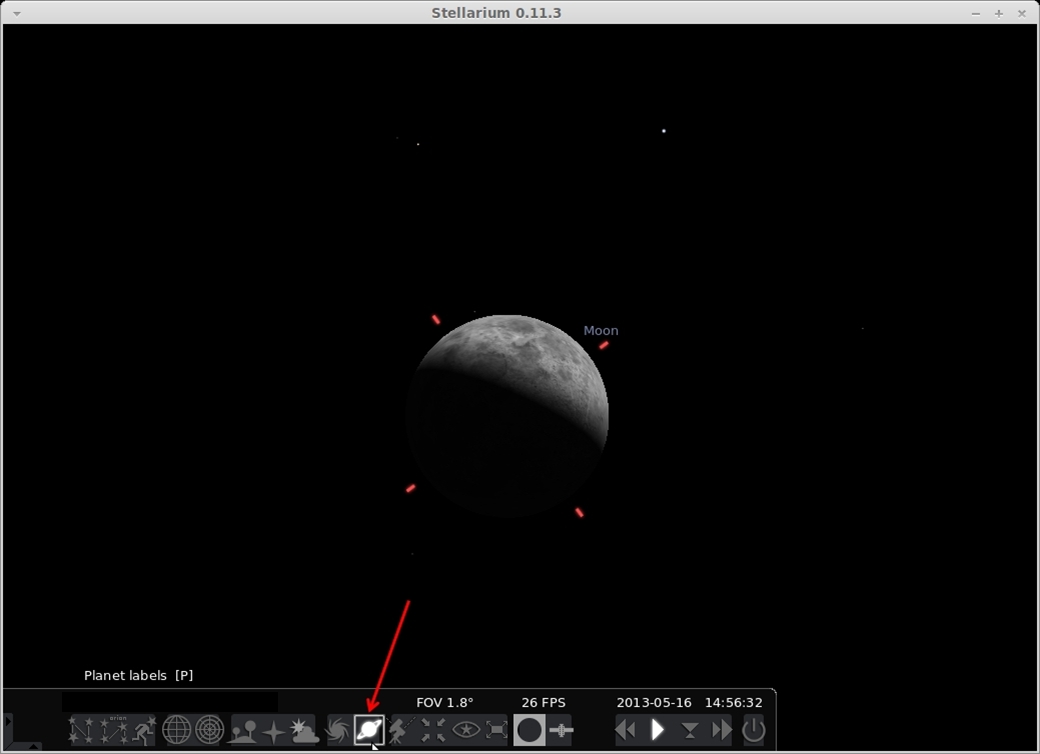
Click the "Saturn" icon to "un-highlight" it, and the "Moon" label will go away.
3. Turn off the crosshairs
To disable the red "crosshairs" it takes a little more effort. We have to run a script to do this. This is not difficult, so let's do it:
Press the F12 button on your keyboard and the "Script Console" window will open:
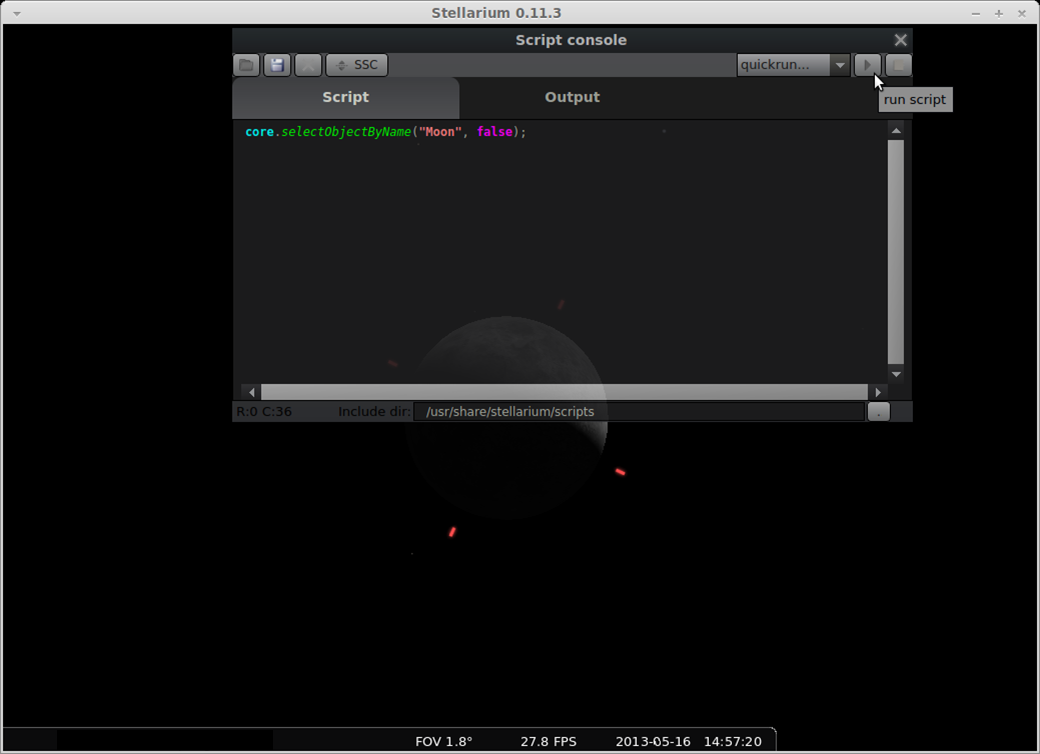
As shown above, the "Script" tab is selected, type in "core.selectObjectByName("Moon", false);" into the Script window, then click the "run script" button (refer to the upper right of the illustration above.) Then, click the X in the Script console dialog box to close the script dialog. The red crosshairs should be gone!
(Note: to get the crosshairs back, simply open the Script console dialog window again with F12, select the "Script" tab, and change "false" to "true", then click the "run" button again.)
4. Turn off all other data displayed
All other display features are disabled in the Stellarium window itself. At the bottom of the window are several icons which "toggle" a feature "on" or "off". Basically, turn off everything:
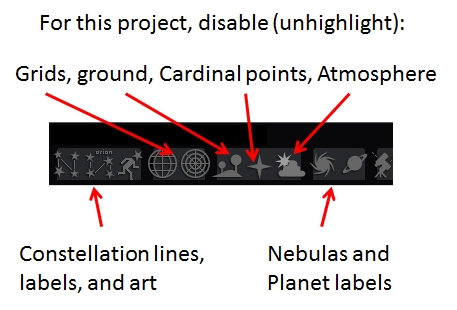
All done!
If the moon is not the desired size - adjust the zoom (PgUp/PgDn or CTRL+Up/Down Arrow), and then to ensure it remains centered, you may need to again "select" it, by clicking on the moon, then select "Center on selected object" again as seen here:
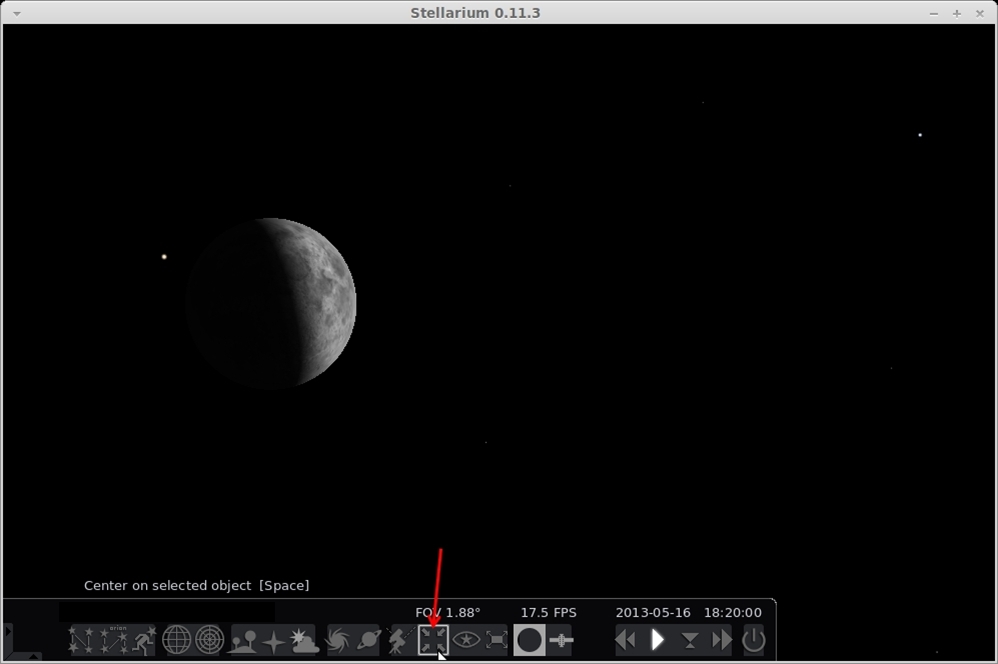
The moon will re-center, and stay put! (If the mooon "drifts" in the window, it has not been selected and centered). Now adjust the edges of the Stellarium window to the desired size, and position the window where you like it on your screen. The moon will stay in the center of the window and you can check it periodically for its phase, and by its orientation and age, even know if the moon is presently visible in your sky.

If you want the added data such as magnitude, Alt/Az, phase, etc., just go back to the "Configuration window", and re-enable "Selected Object Information". You can even choose "Customized" and select what data you want displayed:
Auto Configuring Stellarium via script and config.ini
Upon configuring Stellarium to show only the moon in real-time, in a window displayed on the desktop, the next step was to "automate" the process so whenever Stellarium needed to be restarted all configurations would be established upon starting Stellarium. I found this could be done with a combination of the command-line, config.ini file, and a script.
I will describe changes needed to the config.ini file first, then the script, and conclude with the necessary command-line.
config.ini
When starting Stellarium, whether or not it opens in full-screen mode is controlled by the config.ini file. (On a Windows machine, the config.ini is typically found under C:\Users\username\AppData\Roaming\Stellarium, on other operating systems search for the config.ini file). I prefer my real-time moon in a small window, so I make the following changes to the config.ini file:
- In the [video] section, change "fullscreen = true" to "fullscreen = false".
- I like to auto-size the Stellarium viewing window, so I set "screen_h = 420", "screen_w = 420", and "screen_y = 350". That last setting moves the window a little over half-way down the left side of the screen. You will need to experiment with thee numbers to set the window size and position to your liking.
- In the [gui] section, change "selected_object_info = all" to "selected_object_info = custom"
- In the [custom_selected_info], change to "true" any selected object detail you wish. In my case, I use: "flag_show_altaz = true", "flag_show_magnitude = true", and all others remain "false".
- Finally, since I am displaying only the moon, I alter the Field of View (FOV) to make the moon appear the size I want. I use 1 degree. This is in the [navigation] section; set "init_fov = 1". Again, you will need to experiment with this value for your use.
Script
I created a script to turn-off or disable all other display attributes, and disable the red-rotating cursor around the moon.
Cut and paste this script into the Script Console window (F12), and save under a name like "Real_Time_Moon". Here is the text of the script:
|
// |
Command-line
With the config.ini file modified, and the script ready, all that is needed is to add the script to automatically execute when Stellarium starts. This is done on the command-line. In Windows, a program shortcut can be created, and then modify the shortcut (right-click, Properties, Target) and change: "D:\Science\Stellarium\stellarium.exe" to read: "D:\Science\Stellarium\stellarium.exe --startup-script Real-time-Moon.ssc". (Of course, your command line may have a different drive (D:), and a different directory structure (\Science\Stellarium\), and your script name may not be "Real-time-Moon.ssc".
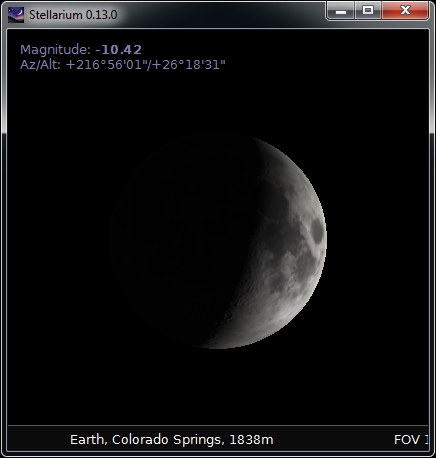
With the command-line modified, double-clicking on the shortcut, starts Stellarium, and executes the script and quickly the moon is displayed with no further intervention or adjustments required. In my case it looks like this (and you see the version is now on 0.13.0. The "manual" instructions above still reflect version 0.11.0 when this article was first posted.):
Footnote: If you use Stellarium for other astronomical viewing, you may not wish to modify your config.ini file as I have done above. In that case, simply copy the Stellarium config.ini file to a new .ini file with its own name, such as "moon.ini", and make the changes described above in the new moon.ini file. Then, when you wish to run the real-time moon, create a shortcut which adds the moon.ini file to the command-line as so: D:\Science\Stellarium\stellarium.exe --config-file moon.ini --startup-script Real-time-Moon.ssc
In this manner, your regular display of Stellarium, with its original config.ini file is not altered and you can run Stellarium without the modified moon.ini file or the script as usual. You may need to include the full path to the moon.ini file.
Bill Welker,
May, 2013
Last updated 21 Apr 2016
